Showing posts with label F.I.N.E.. Show all posts

Tuesday, August 12, 2014

Pasta Play and Book Update

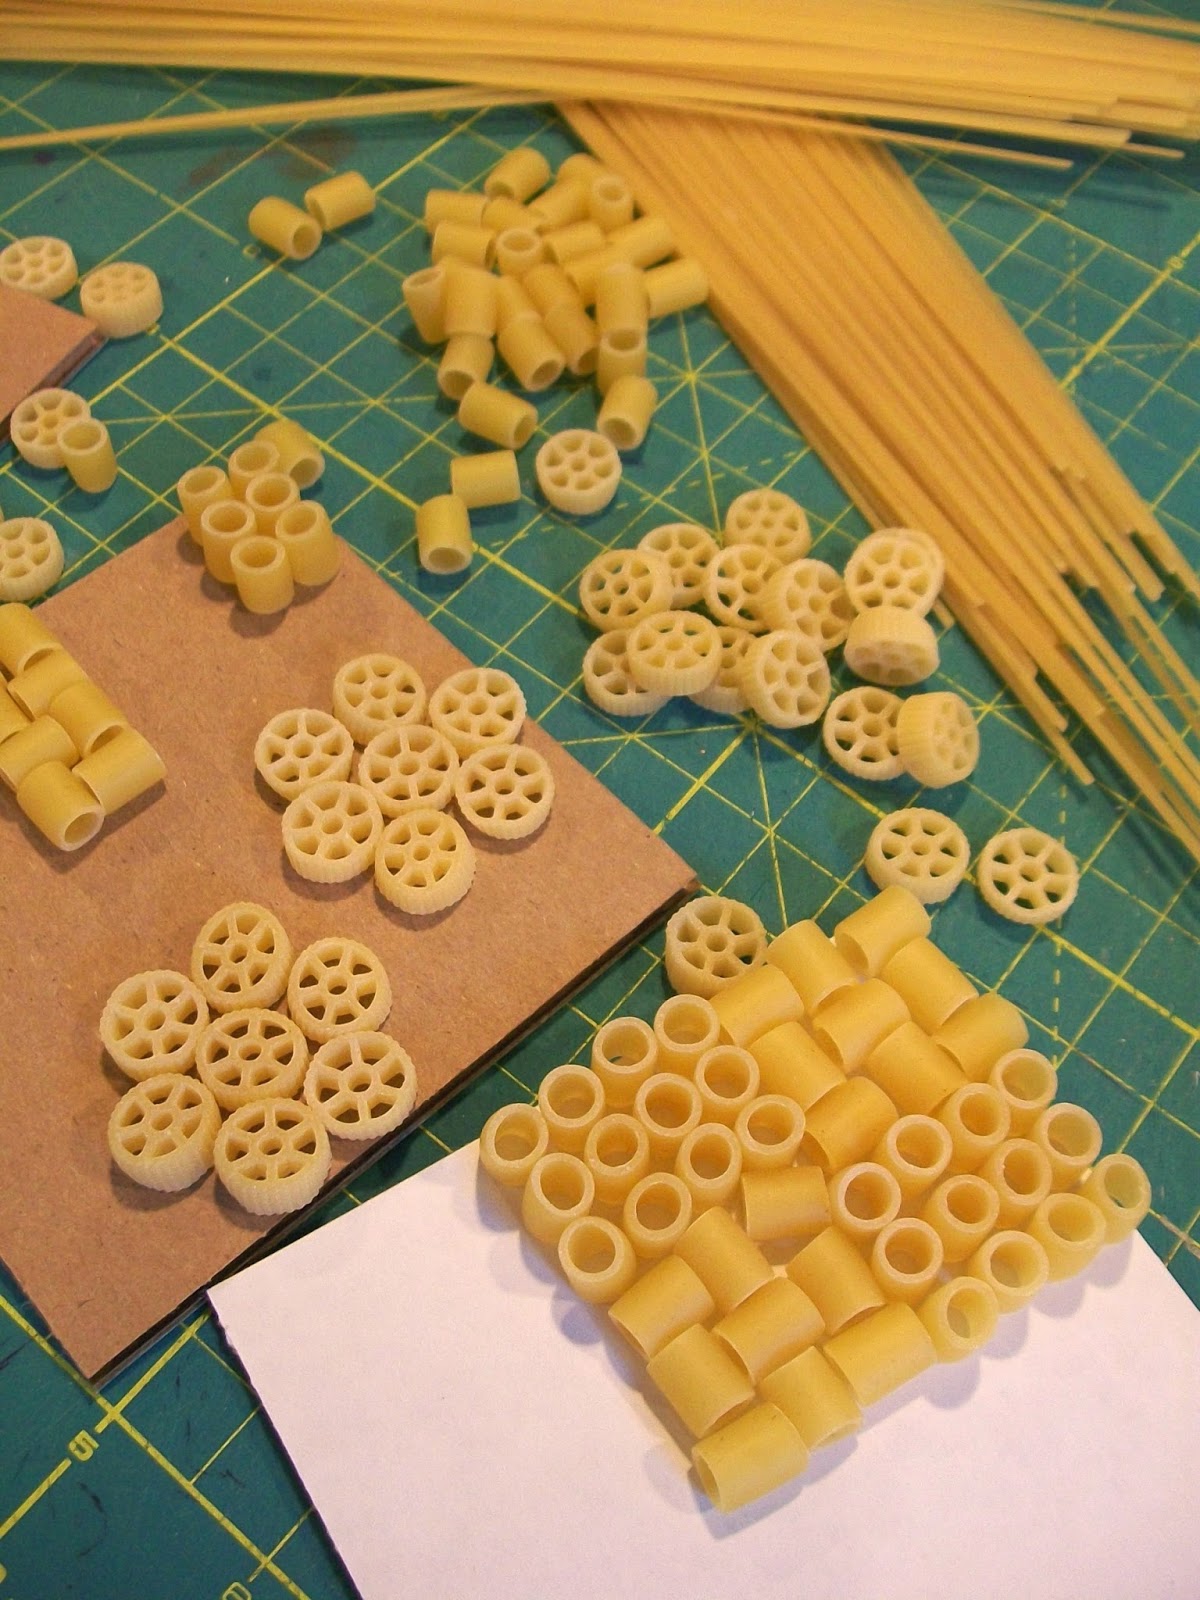
I've been arranging pasta patterns to make print blocks for the next newsletter.

I spent Sunday in the studio... playing with pasta! I'm preparing for the next issue of Julie B Booth Surface Design News. A couple of the blocks took quite a while to put together. I have a greater appreciation for mosaic and inlay work! I can't wait to see the fabric prints I can make with these pasta blocks. I'll post a preview right before I publish the newsletter.

On the book front... You might have noticed the book icon just to the right. It's a link to my page on the Quarry book shop.

The "working" cover for the book. The final cover design is in the works and will be ready soon.

From there, you can click on your favorite book seller to pre-order Fabric Printing at Home. I spent an hour on the phone last week with Quarry's marketing manager and will be talking with their social media specialist today. I'm learning A LOT! Apparently, pre-orders are what to strive for...so... I'm hoping that some of my blogging buddies out there will put in an order soon! (especially those of you who contributed to the gallery section of the book) :-)

Okay...enough shameless plugging for now. I'll be off to Old Town Alexandria this morning to meet with my F.I.N.E. buds. It will be great to see what they've been up to the last couple of months. And...even though it's raining, I'll be bringing my camera along in case I spy some PINK (Roy G Biv on August 20th).

Hope you all have some creative plans for today! I'll be back to gluing pasta this afternoon....


Thursday, June 27, 2013

First Five


Here are the first five squares for Crossroads.


During the meeting with my exhibiting group, F.I.N.E. (Fiber in Nearly Everything), I got some useful feedback and some possible new directions in which to take this piece.

There are many more squares to make.

Before I left Savannah, I laid out the large printed squares from the family printing project. I'll be painting/printing some fabric for borders around these and for the backing fabric.


It's going to be a busy summer!

Tuesday, June 18, 2013

Searching for Roy on a Rainy Day


I was down in Old Town Alexandria for a meeting with my group, F.I.N.E. (Fiber in Nearly Everything). 

Old Town is a great place to walk around...lots of color, texture...little secluded gardens. So after the meeting and lunch, I went for a walk with my friend Ann in search of Roy (blue to be exact).

I did find some blue which I'm saving for Thursday...though searching for blue on such a gray and very rainy day was a bit challenging. Also a challenge was taking the photos themselves, trying to balance my umbrella under my chin and at times shooting photos one-handed (a skill I've gotten quite adept at!).

Along with blue, I found the full spectrum in a window display of tile...


and a cheery grouping of pin wheels.


I finished the blue Challenge fabric last night. Hand painted, salted then printed with a Confectioner's sugar resist and finally printed with fabric paint with some hand painted details. This fabric will go to a lucky participant in Thursday's Search for blue. Hope you plan to take part (tell others...the more the merrier!).


Friday, May 10, 2013

Crossroads

Detail from Red Chair

Now that I've given myself permission to take a different direction for the F.I.N.E. mapping show, I'm finding myself looking back at some techniques that I enjoyed and want to explore further.

I've decided to focus on two ideas.

One is the concept of Crossroads.This is hitting home particularly as I try to find my way to the next stage in my artwork. At the moment, I'm conceiving (great word!) of this as a series of square shapes with strips of fabric hand stitched to form cross shapes. The overall design will be made up of nine patches using these squares and there will be a large cross shape formed in the center.


I'm debating about make the squares or rows of squares into stuffed pockets that I can quilt as I go. This is similar in concept to how I worked on my small primitive dolls.

Small Primitive

I like the effect as it creates a sturdy piece, that's feels good in the hand.

The other idea is X Marks the Spot. This piece will be made from small folded squares sewn together to form units that have an X in the center. These will then be sewn together so that a larger X is formed.


I used this technique for a piece called Red Chair that I made ages ago. I've always wanted to come back to this technique. Now seems like a good time.


Both of these ideas are larger pieces generated from small parts.  Right now, I'm dyeing, painting and printing  lots of fabrics that can be cut into small units. These will be portable (until they are sewn into the larger pieces). I know that I'll be making some trips to Savannah to see my folks so having small portable units to work on will keep the ball rolling with these pieces.

Two artists got me thinking about working in small units that I could carry with me and work on anywhere. My friend, and fellow fiber artist Pam Sullivan suggested that working larger didn't have to mean a single large piece but perhaps instead many small units that become the larger piece. Maya Matthew recently had a post about a textile piece she carried around with her and worked on over a period of time. Click here to see the post.

So...I am beginning work on these two ideas and will see where they lead...


Tuesday, May 7, 2013

Permission

Permission Slip
 It's a silly thing, really.

Giving yourself permission.

Today, during a meeting of my group, F.I.N.E., we had a serious discussion about where the group was going. We've been having some growing pains as a number of us are working through transitions in our artwork.

We have a show scheduled for the end of the year with a theme that we've been trying to work with for the past two years.

It seemed like an exciting theme back then, and still an interesting one. But, I've been feeling locked into what I started two years ago.

Today, one of the artists in the group said...Do what is calling to you. We can make it work in the show.

She gave me permission. And then I realized, I had to give myself permission too.

Why is it so hard to do that sometimes?

Thursday, August 30, 2012

Hamsa Redux: More Stitching


 I am finally getting back to the hamsa for F.I.N.E.

It's been a while since I last worked on this piece.


I'm making progress and hope to get the stitching done over the course of this next week.


I need to get on to other things. Particularly, printing more weed fabrics before the end of fall.

Then I have to make design decisions about creating Weed Maps from those fabrics for the F.I.N.E. show coming up early next year.

Time is flying by...

Sunday, July 15, 2012

Hamsa Redux: Starting to Stitch


I finally had the chance yesterday to start stitching on the new (and hopefully, improved) version of the hamsa piece for F.I.N.E. We are having a meeting this coming Wednesday and this needs to be completed or at least VERY far along.

I pulled out my embroidery floss and started auditioning colors. I had a pretty good idea about where I wanted to go, but the subtleties of the colors required a bit of thought.


I also wanted to try some stitch variations for the eyes on the fingertips, including: back stitch, stem stitch, satin stitch and chain stitch.


I actually liked the look of the back side of the back stitch which appeared as a looser version of the stem stitch. Rather than working from the back, I decided to do a less regular stem stitch. The finished sample eye is what I'm planning for the final piece.


Here is the progress so far.


There is still much to do.

Yesterday's entertainment while stitching included watching/listening to Mystic River and part of The Shining...what a strange combination...wonder if it had any effect on my stitching!

Friday, July 13, 2012

Hamsa Redux Continued

Hamsa fused to purple background
 Yesterday was happily a full day of working in the studio. I was able get more done on the hamsa piece for my exhibiting group, F. I. N. E.

I backed the orange fabric with Mistyfuse. I haven't used this product before. I don't really work with fusibles generally, but the Mistyfuse seemed to work quite well.

After backing the fabric, I placed the hamsa design on a light table and traced the design with a colored pencil. I then cut the hamsa out with sharp scissors and fused it to the purple/dark green fabric.

I again put the piece on my light table and lined the fused hamsa up with the design so I could trace the circle behind the hamsa onto the purple fabric.

Hamsa on light table so I can trace circle design.

Circle design traced with colored pencil. Now it's ready to cut out.

After cutting out the design with scissors, I placed it on the canvas just to get an idea of how it would look.


Finally, I fused the hamsa to the light green fabric.


Next step is adding stitched details. I plan to do that this weekend.


Saturday, June 30, 2012

Hamsa Redux


Remember this?

Remember my saying that I thought I liked it better than this?


I've decided to redo the hamsa piece for F.I.N.E.

The first thing I did was to enlarge it. It will now fill out most of the 12" square canvas.


I also decided that I would create three separate fabrics, back them each with a fusible, cut out the needed shapes and fuse them together. I want this piece to be bolder than my original concept.

Today, I worked on the orange fabric that will be used for the hamsa hand.

After a wash of color with Pebeo Setacolor Transparent Fabric Paint, I applied Pebeo Opaque Fabric Paint with a piece of scrunched plastic wrap.


I decided that I wanted to create a hot glue block with circular designs that would fit within the hand.


At first, I made one print with the hot glue block on the orange fabric. I used light orange Opaque paint. It was barely noticeable and very boring.


 I then decided to print the fabric with the block multiple times, changing the orientation of the block as well as printing it in two different shades of orange.

This is how it came out.

Orange fabric detail

Definitely much more interesting!

Tomorrow, I work on the other fabrics.


Sunday, June 3, 2012

What If-ing Weeds

Experimenting with printing weeds
 Having been inspired by my Skype session with Pam and Jennifer, I decided to do a bit of what if-ing with the weeds in my garden.

My exhibiting group, F.I.N.E., has an exhibition planned for next year called, All Over the Map. I decided to focus on ways of mapping the weeds in my garden. So far, I have two finished hangings based on my drawings of Wood Sorrel. I've been trying to figure out some other ways of working with weeds.

The what if-ing began with gathering some weeds. My garden is overrun with a weed that is as sticky as Velcro! Another weed had large broad leaves.

I first decided to put the weeds under cotton fabric and roll over them (a brayer rubbing) with Opaque Pebeo Setacolor Fabric Paint.

I noticed that the weeds left a design on the paint on the foam brayer and if I rolled it out on another piece of fabric, I could get soft impressions of the designs.

I then tried some direct printing. I rolled opaque paint out on the glass palette and placed the weeds on the paint. I then applied more paint to the other side of the weed/leaf. I sandwiched the weeds between two pieces of cotton fabric and pressed down so the fabric paint would release onto both pieces of fabric.

This worked especially well with the large leaves.

In addition to working with the opaque fabric paint, I also did some techniques using diluted Transparent Pebeo Setacolor Fabric Paint. I'll show you the results of those experiments tomorrow.