Showing posts with label block printing. Show all posts

Sunday, May 15, 2016

Story Cloth: Slowly Stepping into Stitch

Hattie B.: Mourning dove.

This past week in To Tell a Story with Cloth, students spent time doing a bit of printing and cutting and stitching. The stories are beginning to take shape!

Hattie B. decided to do a little book of the birds that she and her grandson see at the bird feeder. I love the textural stitching! Hattie is using a beautiful softened linen and we all wanted to know her source. If you're interested...here is the link!

Hattie B.: Gold finches (sorry about the background color...my camera was NOT cooperative!).

Amy P. is continuing to explore her ancestral connections with the shtetl. She's cut and combined a number of her pieces. Now it's time to get stitching (before her daughter arrives!).

Amy P.
Jan B. is working on a piece that in some ways jumps off from her paper lifeline (see here for more info). Her piece is about the journey...with little safe havens (homes full of love). She spent time in class couching threads along the path.

Jan B.

Karen M. is working on a series of pieces about spring. She plans to cut and attach the cherry blossoms to one of her pieces.

Karen M.
Karen M.
Karen M.: Cherry blossoms

Lee W. decided to continue with the theme of protection that she started exploring in the cut paper exercise. She is composing a series of vignettes using similar shapes to express the theme.

Lee W.

Kathy F. is designing a piece as a memorial to a friend (who was an artist) who recently passed away. She plans to incorporate the symbol of being lifted out of a cage (to safety)...a motif that her friend used often in her art. Her friend also loved nature.

Kathy F.
Kathy F.: Detail of a little girl design that she found on a piece of vintage cloth.
Kathy F.: Detail printed owl

Kathy also made a monoprint of the owl...a reverse of her block print!

Kathy F.

Marine L. started to play with stitching!

Marine L.: A figure starting to appear.
Marine L.: Could this be the center of a flower?

Kathy B. is beginning a series with her cat prints.

Kathy B.
I'm so enjoying seeing where things are moving. This coming week is our last...this class is always too short!

Saturday, June 6, 2015

Spring Surface Design-- Wrapping Up

"Twiggy" by Janelle F.

The spring session of my surface design class wrapped up this week. I gave you a look at some of the work produced in class, here. I thought you'd like to see a few more photos of work from the final class.

One of the techniques I show students is how to take a high contrast photograph and turn it into a design for a carved print block. It's a step-by-step process and I talk about how it's possible to produce the "grey values" of a photo by carving different textures or line weights in the final block design. Janelle took on this challenge using a photo of the model, Twiggy. I love all the iterations of prints...very Andy Warhol!

"Twiggy" by Janelle F.

On the last night of class, I gave a Shiva Paintstiks demo. Here is what Janelle did using a cut freezer paper mask.

Janelle F.: Paintstiks and freezer paper mask

Lissette used Paintstiks to add details to some of the fabrics she created using resists. She slipped texture plates under the fabrics and made rubbings.

Lissette V.: Paintstik details on top of flour paste resist fabric.
Lissette V.: Paintstik details on top of glue stick resist fabric.

Amy continued to work on one of her stitched pieces about her trip to Israel. She added painted lace to the water section of this piece. I think this works really well...I'm reminded of light bouncing off  water.

Amy L.
In this close up you can see the dimensional applique treatment of the water.

Amy also brought in the piece that she started at the May Stitch-In. She completed it and will be giving it to her sister. The piece shows the two of them as youngsters on a tree swing together (I'm in love with this piece!).

Amy L.: Sisters swinging.

All in all.. a great group to teach! Hope to see some of you in a future class!

Sunday, May 17, 2015

African (and a little Latin too!) Influences

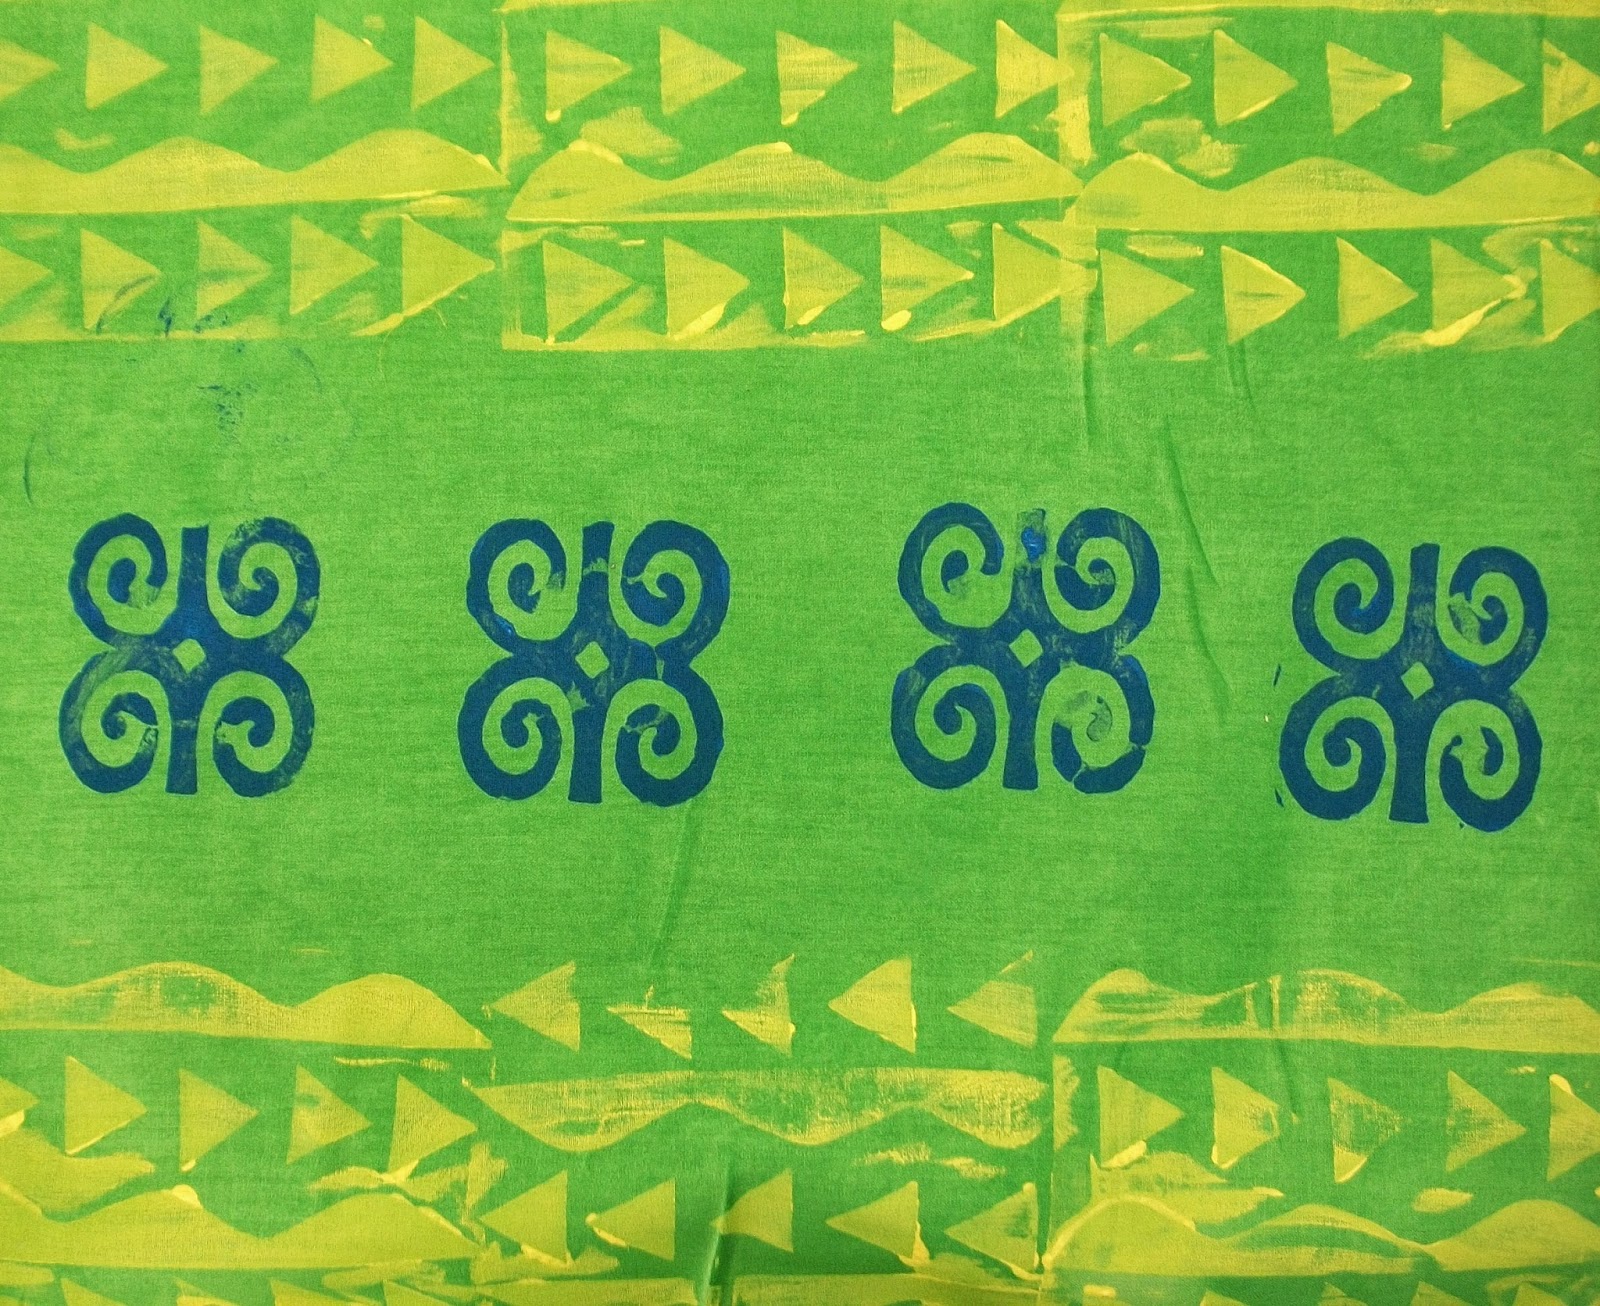
Detail of fabric by Deborah H.

Today I taught a small group of students. It was a combo of both my African Influences and my Latin American Influences classes. In both those classes, I have students "jump off" from traditional textiles from those parts of the world.

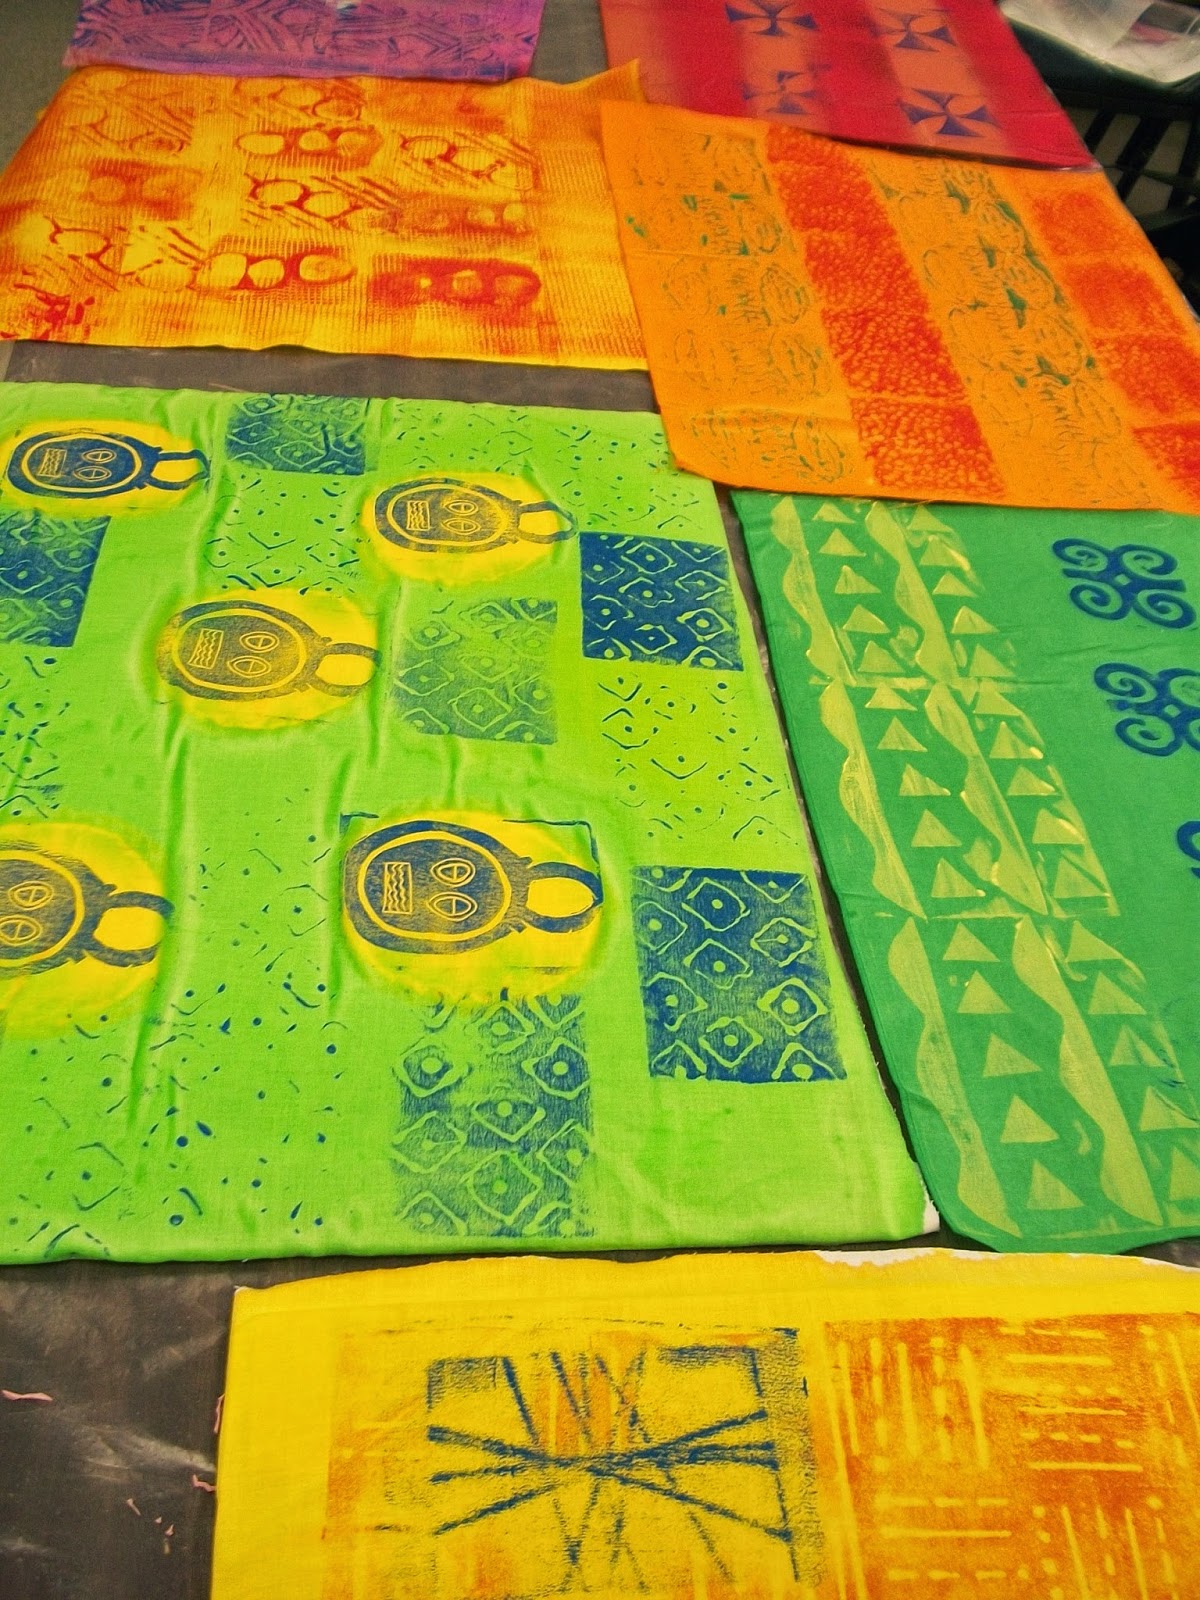
We spent the morning painting fabric backgrounds and then created a number of different types of print blocks. I always have my students print a sampler to test out their block designs before working on some final fabric designs. Here are the samplers:

Sampler by Deborah H.
Sampler by Cynthia B.


Sampler by Wendy R.

And here are some final fabrics.

Fabric by Deborah H.
Fabric by Cynthia B.


Fabric by Cynthia B.

Fabric detail by Cynthia B.

Fabric by Wendy R.

We all agreed that it would have been great to have another hour to print...or maybe even another entire day!!!


Thanks for a great class!

Monday, September 8, 2014

Artful African Fabrics

Fabric by Barbara H.

Yesterday, I taught my African Influences, Textile Inspirations class.

A colorful array of fabrics!

It was a day full of color and fun!

Fabric by Barbara H.
Fabric by Mitzie S-M.
Fabric by Pam D.
Fabric detail by Pam D.
Fabric by Pam D.
Thanks, Barbara, Mitzie and Pam for a great class!

Sunday, May 12, 2013

Searching for Roy G Biv Reminder

Detail of green Challenge fabric.
Yes, believe it or not this Thursday is the next installment of the Searching for Roy G Biv (the colors of the rainbow) Challenge! Green is the color this month. For those of you who haven't played along before, click here for more information.

As usual, I will be offering a chance to win a Challenge fabric. This month's fabric is made with a Confectioner's sugar resist followed by a layer of printing.

Green Challenge fabric.
 Looking forward to seeing lots of green on Thursday!

Monday, December 10, 2012

Day 10: Weekend Work


 I spent the weekend in the studio painting and printing fat quarters. I need to make some samples for a book proposal...i.e. functional items.


Now that the fabric is printed I have to do a bit of sewing.


I have my work cut out for me this week...so much going on...


Wednesday, October 31, 2012

Experiment: Making Clay Texture Blocks


Yesterday, as the remnants of Sandy left us with leaves and branches on the ground and a drizzly rain, I decided to take advantage of a day inside and electricity.

A former student and subscriber to my newsletter sent me an email. She was really excited about the last issue (Issue #6). As a polymer clay artist, she is often embossing clay for printing. She hadn't thought of kidney beans and loved the results I was getting with the embossable foam blocks.

This gave me an idea. I am in the process of writing my book proposal. As my proposed book revolves around using materials from the kitchen for surface design, I wasn't sure if I would include using the commercial moldable foam blocks for embossing. So an internet search began for creating clay using kitchen ingredients. I was fortunate to find a number of recipes.

One recipe for Baker's Clay combined flour, salt and water.
First mix together the salt and flour.


Then add the water.


Stir then knead together until it is dough (clay).

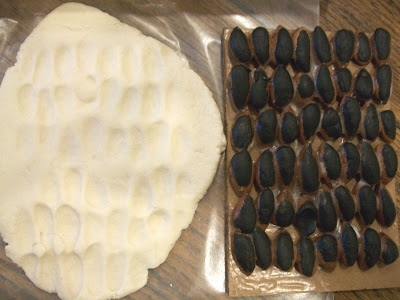
After rolling out the Baker's Clay, I embossed it with my texture blocks.


Here I pushed one of my texture blocks into the rolled-out clay.
The embossed clay on the left. The texture block with almonds on the right.
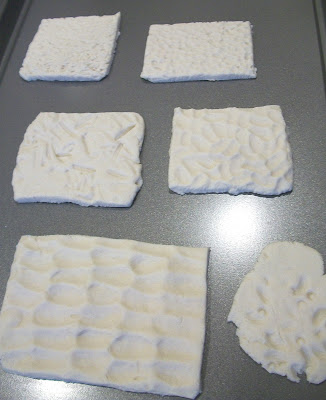
 Then into the oven for baking.

A number of different textures embossed into the Baker's Clay.
 They puffed up a bit. I will probably try a second batch with slight modifications.


Today I decided to print with them. First, I used a foam brayer and then a foam dauber (I describe how to make one in Issue #4 of Julie Booth Surface Design News).


I was surprised...the results were pretty good.


I'll have to explore this a bit more.