Showing posts with label valentine's day. Show all posts

Saturday, February 14, 2015

Day #14: Fabric Printing at Home Blog Tour


Happy Valentine's Day! It's the last "official" day of the Fabric Printing at Home Blog Tour. I've thoroughly enjoyed myself...thanks for all your great comments, discussions and ideas! Today, we're heading over to Jackie Lam's blog. Jackie is also a member of The Printed Fabric Bee. Every month, I'm so impressed by the artistry of her fabrics which often contain beautifully hand-drawn elements. Recently, I found out that she is also the mother of 3 and now 4 young boys! I hear that they had a hand in her blog post today.


I have been a mixed media artist for 10 years and a graphic artist for almost 20 years. My non-traditional cloth and mixed media creations incorporate hand dyed, recycled & vintage fabrics. I love drawing & painting, hand & machine stitching, Thermofax screen printing, and whatever else sparks my imagination.
The fundamentals from which I create my pieces are a studio art degree from Michigan State University and a graphic design degree from Lansing Community College. For the last several years I’ve been busy combining my art world with a growing family which provides me with a wealth of inspiration for my work. You can see more of my creations and adventures at my website www.studiolams.com


Be sure to stop by Jackie's blog today and leave a comment for a chance to win a copy of Fabric Printing at Home.

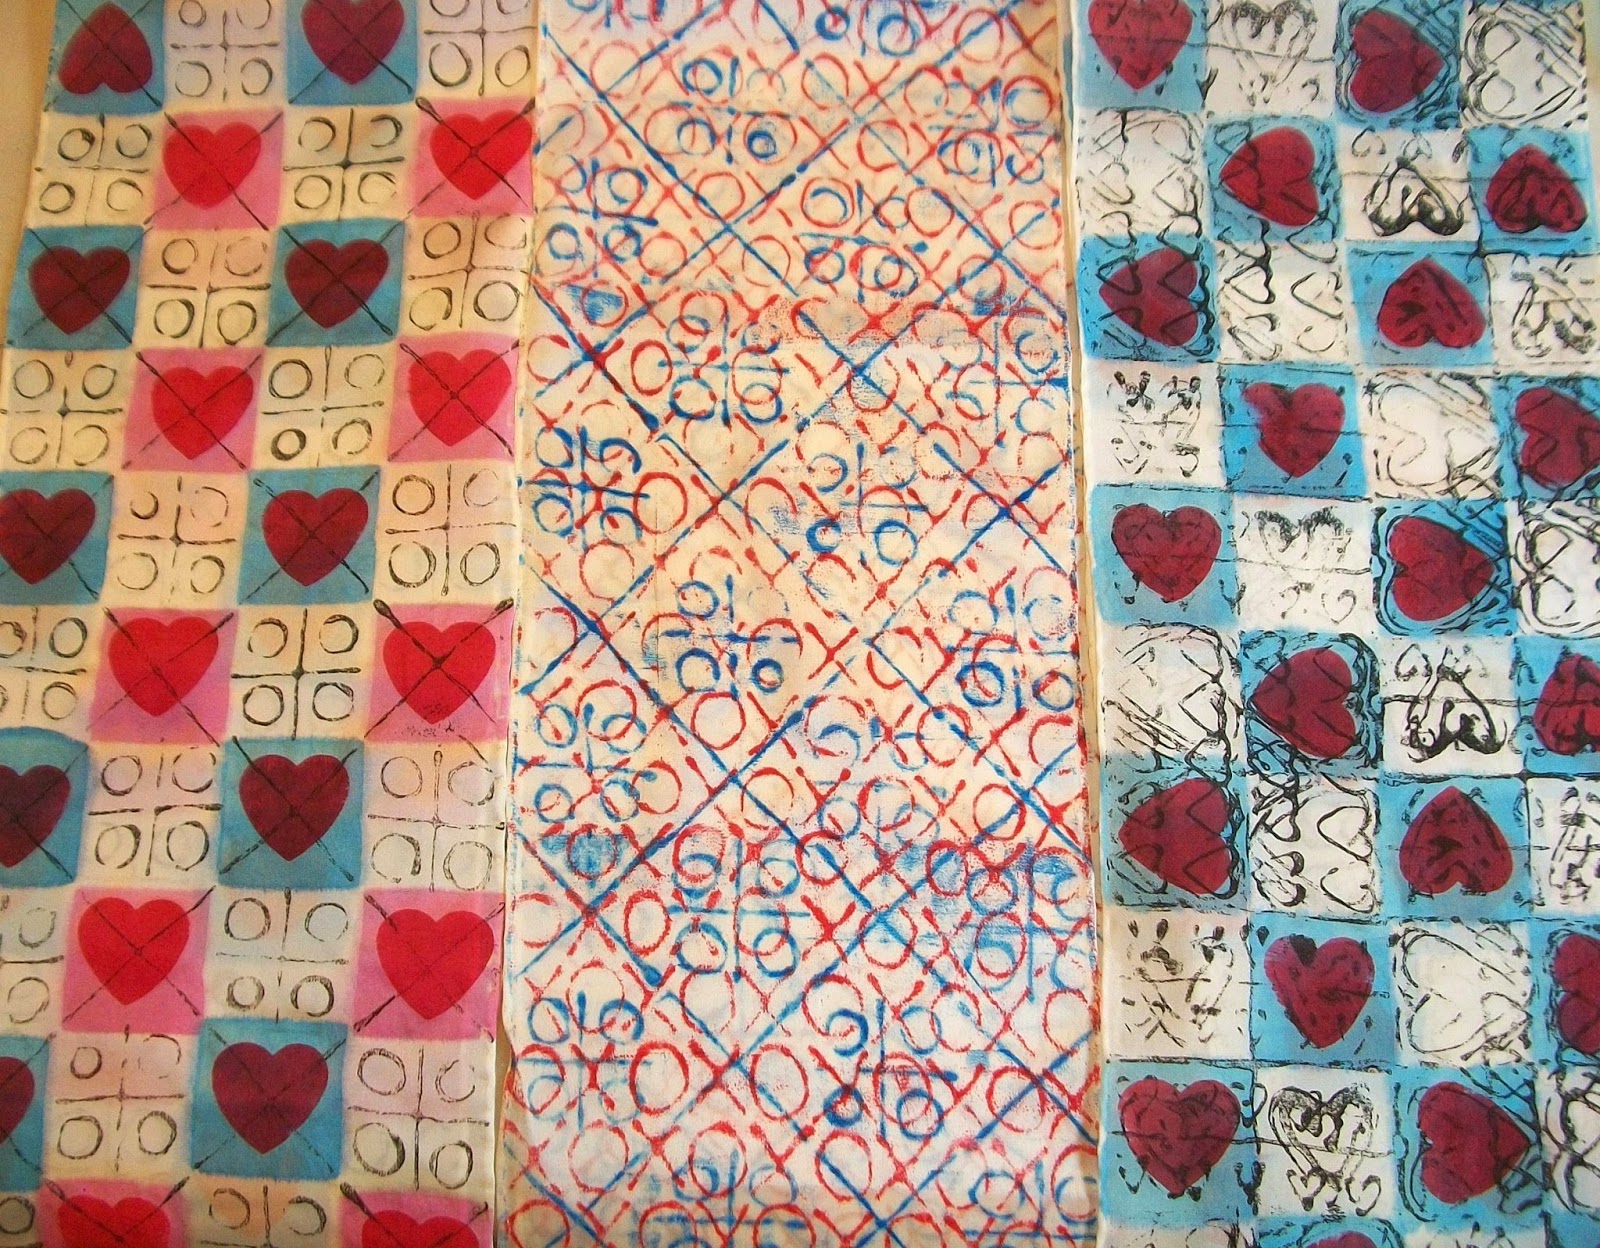
The XOXO Scarf
In honor of Valentine's Day, I'm going to show you how to print a "hugs and kisses" silk scarf using one of my favorite types of print blocks... hot glue on cardboard (see How to Make Hot Glue Blocks pp. 80-81 in Fabric Printing at Home) . For this project you'll be making hot glue brayer rubbings (see Printing Three Ways on p.30 in Fabric Printing at Home).

To make the blocks you will need: Corrugated cardboard, pencil, clear gridded ruler, self-healing cutting mat, craft knife (I used an X-acto), hot glue gun, extra glue sticks.

1. Use the craft knife to cut two squares of corrugated cardboard the width (short side) of the scarf. The scarf I used for this project was 8" wide so I cut two 8" x 8" cardboard blocks.

2. Draw designs on the cardboard. I came up with two variations on  XOXO designs.


3. Insert a glue stick into the hot glue gun and turn on the gun to melt it. Be very careful not to touch the tip of the gun or the hot plastic "glue."


4. Follow the drawn designs on the cardboard. I usually hold the glue gun approximately 1/16" off the cardboard. Squeeze the trigger of the hot glue gun and release it at regular intervals to keep the heated plastic "glue" flowing.

To print (brayer rubbing) the blocks you will need: The hot glue blocks, silk scarf (I used a 8" x 54"  12mm silk satin scarf), flat work surface that can accommodate the scarf's dimensions (cover with padding and plastic) 2 colors of transparent fabric paint (I used red and blue), plastic containers and plastic spoons, glass or plexi-glass palette, dense foam brayers (I like Rollrite), paper towels.

1. Lay the scarf on the covered flat surface. Place one of the hot glue blocks under the scarf.


2. Spoon 1/4 teaspoon of red transparent fabric paint onto the glass palette. Roll the dense foam brayer over the paint until it is evenly coated. Add paint to the glass palette a little at a time as needed.

3. Carefully roll the paint-covered foam brayer over the silk covering the block. Shift the block to another spot and continue until this first design covers the entire scarf.


4. Repeat the process using the other hot glue on cardboard block and the blue paint.


For more ideas and Valentine's scarf designs go to Issue #25 of Julie B Booth Surface Design News, my free monthly online newsletter. For projects using the kitchen as your surface design on fabric resource, please sign up and the newsletter will appear in your email mailbox once a month (sign up in right-hand column of this blog).

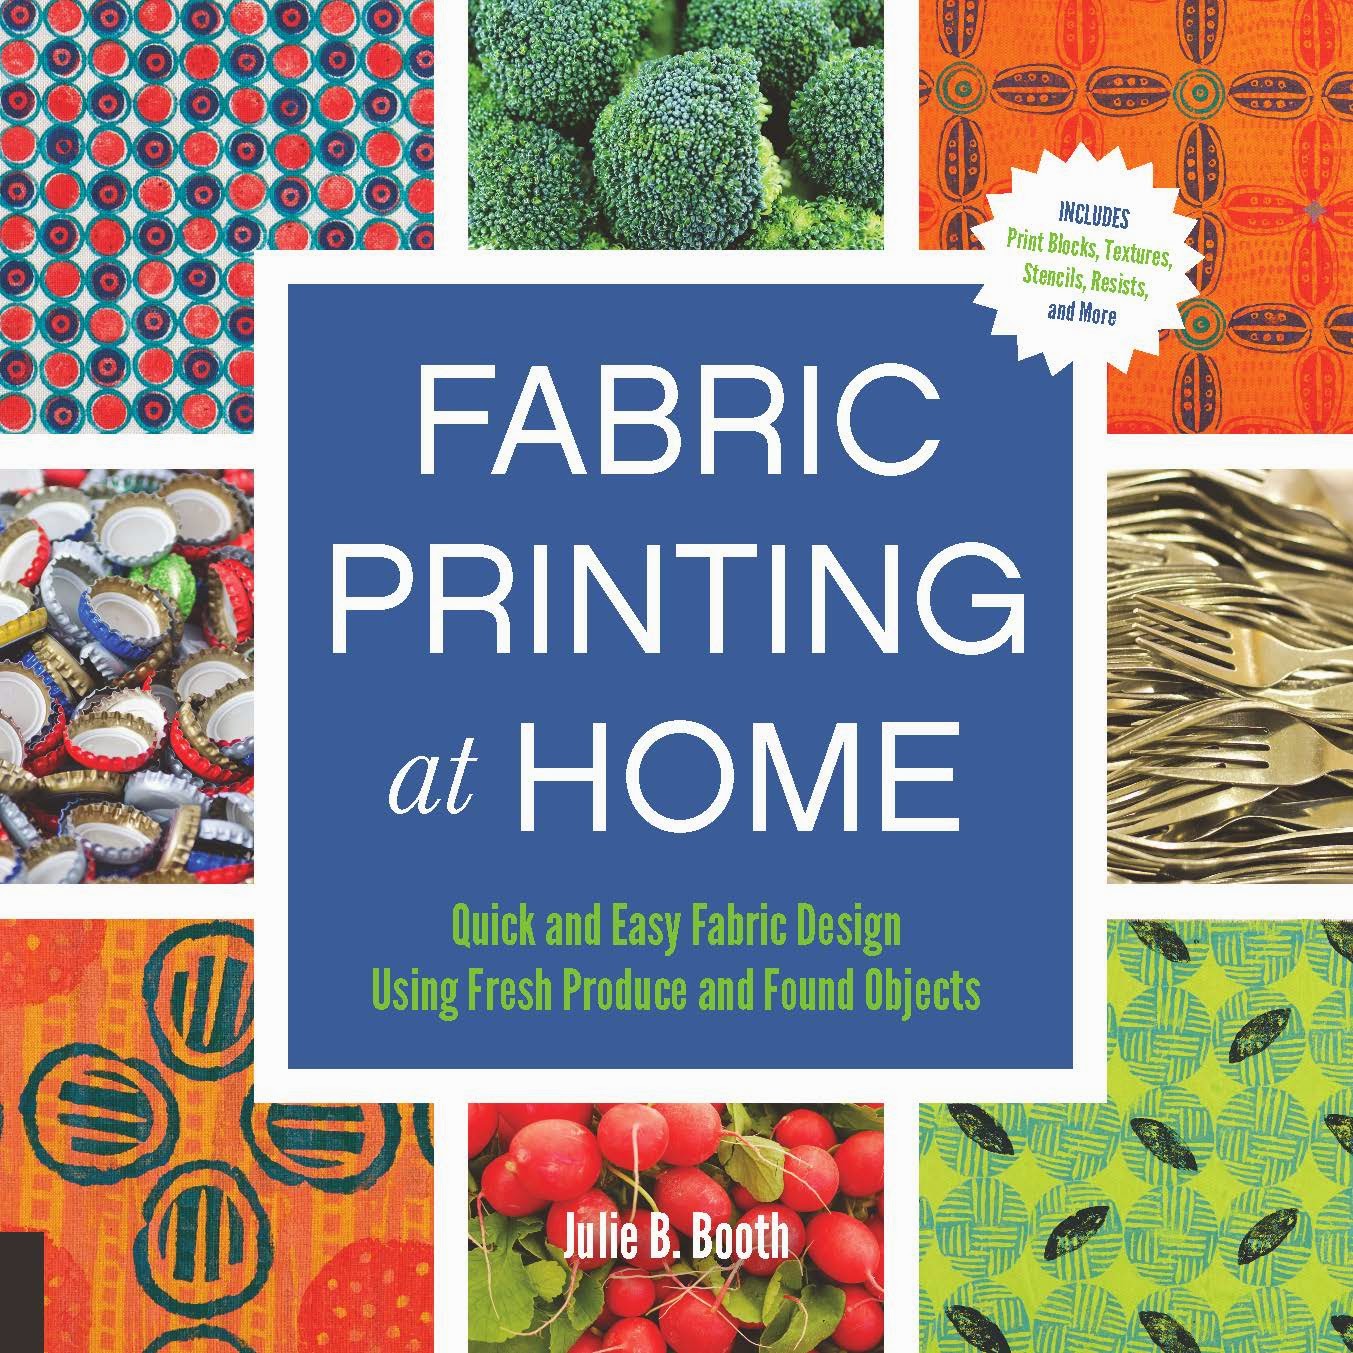
Today is the last chance to leave a comment to be eligible for the book drawing. I'll take comments until midnight (Eastern USA time). Tomorrow at noon, I'll do the final drawing for a free copy of Fabric Printing at Home: Quick and Easy Fabric Design Using Fresh Produce and Found Objects.

 And now for the winner of yesterday's giveaway (one yd of Kona PFD)...congratulations to Kathy Davis! Please email me with your contact information (threadborn@cox.net) so I can send off your prize.

Be sure to visit all the stops on the Tour. Please note, I've added the deadlines to enter the giveaways at each stop:
 
February 2 (winner: Emily Vanderlinden): Lisa Chin 

February 3 (winner will be chosen noon Feb 15-book and stencils!): Lynn Krawczyk
February 4 (winner will be chosen end of Feb 13): Jane Davila
 
February 5 (winner of book and fabric: Monica Weidmann): Carol R. Eaton
February 6 (winner will be chosen end of Feb 13- 2 book copies!): Judy Gula 
February 7(winner: Deb Clarke): Susan Purney Mark 
February 8 (winner will be chosen on Feb 15): Teri Lucas 
February 9 (winners: Pam (Stashbee) and Alison): Jennifer Coyne Qudeen 
February 10 (winner will be chosen on Feb 17): Deborah Boschert 
February 11 (winners: Carole Gold and Dawn Jones): Lynda Heines 
February 12 (winner will be chosen 5PM on Feb 16): Cheryl Sleboda 
February 13 (winner will be chosen on Feb 15- book and fabric!): Terri Stegmiller 
February 14 (winner will be chosen on Feb 18): Jackie Lams


Wednesday, February 4, 2015

Day #4: Fabric Printing at Home Blog Tour


Welcome to Day #4 of the Fabric Printing at Home Blog Tour! Jane Davila is hosting the Tour today. When I read her bio I was very impressed by the depth and diversity of her art experience...

Jane Davila

Jane Davila is a fiber and mixed-media artist who began her professional art career as a printmaker, specializing in etchings and intaglios. Her prints can be found in many private and corporate collections around the world. She switched to fiber, mixed media, and art quilting in the 1990s but still incorporates many printmaking techniques, such as screen printing, block printing, gyotaku, and thermofax printing, in her work. The experience of living in Peru in the 1980s has had a lasting impact on her appreciation for the diversity of cultural expression and iconography, which as a theme frequently shows up in her work. Repeating motifs of fish, birds, and insects reflect her ongoing fascination with nature, the environment, and human impact on both. www.janedavila.com   www.janedavila.blogspot.com

Be sure to stop by Jane's blog today for a chance to win a copy of Fabric Printing at Home.

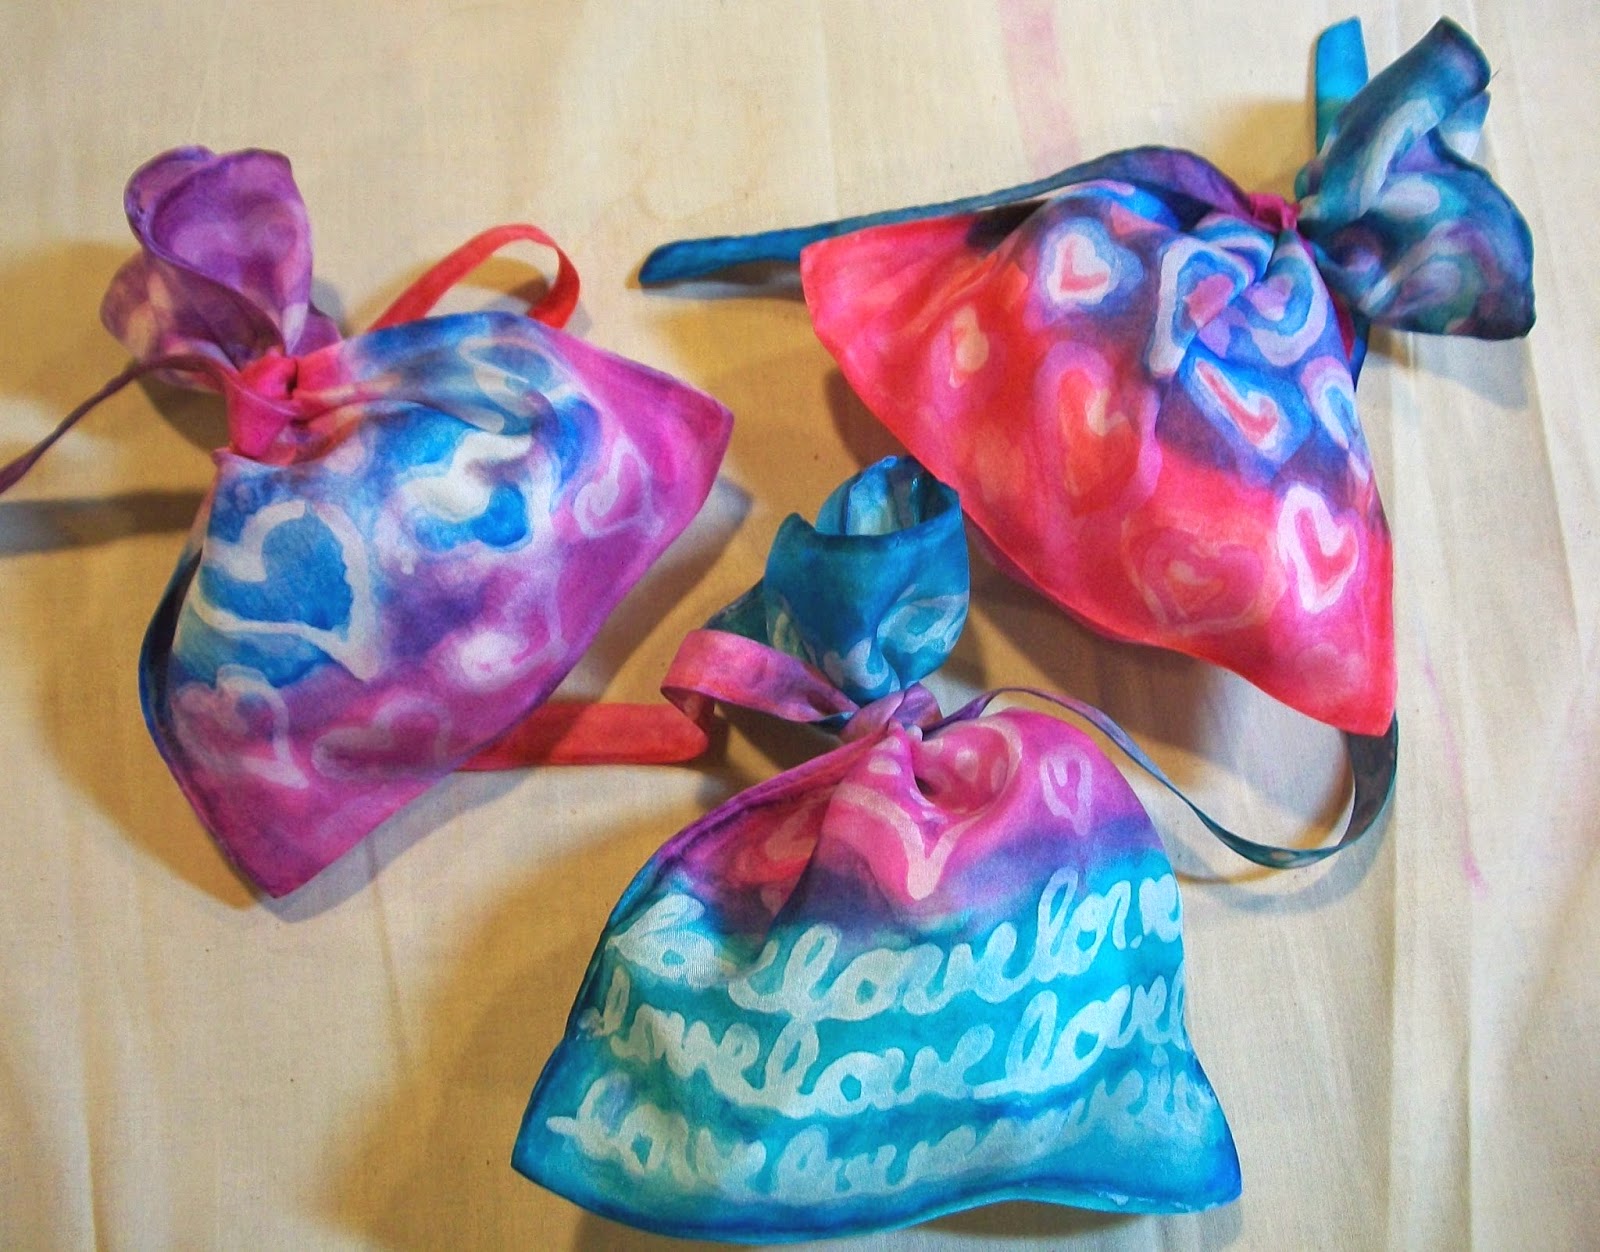
Sweet Silk Gift Bags 
These sweet little silk gift bags are quick and easy to make using liquid dishwashing soap as a fabric resist.
You'll need some small silk bags (I got mine from Dharma Trading Company), a few Valentine's transparent fabric paint colors (I used Pebeo Setacolor), paint containers, plastic spoons, water, 1" foam brushes, a small plastic squeeze bottle (I used a Detailer Writer from Dick Blick), liquid dishwashing soap, a work surface covered with plastic and a piece of cotton or muslin fabric to absorb excess paint, an iron and ironing board or pad, a pressing cloth and a water source (for rinsing out the soap).


1. Set up your work area. I used a portable work surface (I describe how to make one in Fabric Printing at Home) but any flat surface covered with plastic and a piece of cotton or muslin fabric is fine.

2. Place a silk gift bag and the bag tie on top of the cotton/muslin fabric. Mix up 3 to 4 paint colors (add a little bit of water to the paint.).

3. Fill the small plastic squeeze bottle with liquid dishwashing soap. If you use the Detailer Writer, snip the tip so the soap can flow out.

4. Use the squeeze bottle to draw Valentine's designs on the silk bag. When the liquid dishwashing soap soaks into the thin silk, the designs will spread a bit. The liquid soap will act as a resist (resisting the paint).


5. Paint over the designs on the bag and also paint the silk bag tie. Set aside to dry.


6. Read the directions for heat setting the fabric paint. I used an iron and a pressing cloth.

7. Rinse the liquid soap out and dry the silk bag. You can stop at this point or go back and add another layer of dishwashing liquid resist and more paint (which is what I did).

Here are the bags after a second layer of dishwashing liquid resist and paint.

Here are the bags stuffed with goodies and tied up ready for Valentine's Day!
Learn other techniques for applying liquid resists and pastes from kitchen materials in Chapter 6: Irresistible! from Fabric Printing at Home.

Today's giveaway is two plastic Detailer Writers. Use them to apply liquid resists or paint to fabric. Leave a comment for a chance to win. I will choose a winner at 11:00 PM Eastern USA time. Check tomorrow's post to see if you are the winner. Your comment also enters you in the final drawing on February 15 for a free copy of Fabric Printing at Home: Quick and Easy Fabric Design Using Fresh Produce and Found Objects. 


And now for the winner of yesterday's giveaway (an X-acto knife and package of #11 blades)....congratulations to Cathy in gorgeous Sonoma County! Please email me with your contact information (threadborn@cox.net) so I can send off your prize.

Tomorrow, the Tour stops at Carol R. Eaton's blog. Her hand-dyed fabrics are inspiring!!
 
Be sure to visit all the stops on the Tour:
February 2: Lisa Chin

February 3: Lynn Krawczyk
February 4: Jane Davila
February 5: Carol R. Eaton
February 6: Judy Gula
February 7: Susan Purney Mark
February 8: Teri Lucas
February 10: Deborah Boschert
February 11: Lynda Heines
February 12: Cheryl Sleboda
February 13: Terri Stegmiller
February 14: Jackie Lams


Saturday, January 31, 2015

Join the Tour! The Fabric Printing at Home Blog Tour Starts Tomorrow


If you haven't seen my promos on Facebook, I just wanted to let you know that the Fabric Printing at Home Blog Tour starts tomorrow, February 1 and runs through February 14.

I've asked 13 other FABULOUS fiber artists (see list and dates below) to join me on the Tour and we will be giving away 14 free copies of Fabric Printing at Home! Each day of the Tour I will introduce you to a new artist with a link to her blog so you can stop by for a chance to win.

In addition, every day of the Tour, I'll be featuring surface design tips and Valentine's Day projects using techniques from Fabric Printing at Home. AND you will also have the chance to win a daily "door" prize!!!


So please Join the Tour and make it a point to stop by here from February 1-14...it's going to be a lot of fun!


February 1: Julie B. Booth
February 2: Lisa Chin
February 3: Lynn Krawczyk
February 4: Jane Davila
February 5: Carol R. Eaton
February 6: Judy Gula
February 7: Susan Purney Mark
February 8: Teri Lucas
February 10: Deborah Boschert
February 11: Lynda Heines
February 12: Cheryl Sleboba
February 13: Terri Stegmiller
February 14: Jackie Lams


Saturday, January 24, 2015

Two Birds

Using hot glue blocks and craft foam to make silk scarf designs.

Busy...busy...

Trying to "kill two birds" as the saying goes (a weird saying!).

Pushing to publish Issue #25 of Julie B Booth Surface Design News and working on Valentine's Day projects to share with all of you during the Fabric Printing at Home Blog Tour (February 1-14)...YIKES!!

Burying myself in the studio today...to create some scarf designs using hot glue blocks and craft foam.

Gluing myself (ha ha) to the computer later today to pump out the Newsletter...

Wish me luck!


Thursday, February 14, 2013

Happy Hearts, Healing Thoughts


Happy Valentine's Day!

I thought I'd share this piece of fabric which I created for the January issue of Julie B Booth Surface Design News. 


I used my X-acto knife to cut designs out of freezer paper which I ironed onto painted fabric and then painted using a foam dauber.


I really enjoyed cutting the designs within the freezer paper heart shapes. I cut freely without drawing designs with pencil. It was very spontaneous and liberating!


This has given me the urge to try some paper cutting. A blog suggestion by Ersi led me to  the site of papercutter, Beatrice Coron.

On her site you can see many wonderful images. She is a story teller and many of her stories are fantastical! This has me thinking about my  A Story in the Making class coming up next month. I'm looking forward to getting into the studio to make up my own stories.

You can see a TED presentation of Beatrice's work here.


I've just found out that Mary Jane Dodd is recovering from septicemia. Mary Jane is a peace-filled soul. She started the Flags for Peace Project which gave me the chance to honor a friend. I am constantly inspired by her beautiful works of jewelry and poetic words. I hope you will send healing thoughts her way.

Tuesday, January 22, 2013

Hearts & Lace Teaser


I was back in the studio today working on Issue #9 of Julie B Booth Surface Design News. The focus this month was to limit myself to using two items: freezer paper and doilies. The theme: Hearts & Lace in preparation for Valentine's Day.

This issue will be coming out on Saturday, January 26. If you'd like to learn more, feel free to sign up (see right hand column). Every fourth Saturday of the month, I get inspiration from my kitchen and come up with interesting surface design ideas to share. In this upcoming issue, I also talk about the challenge of working within limits.

Tuesday, February 14, 2012