Showing posts with label gelatin plate. Show all posts

Thursday, November 1, 2012

Gelatin Night

Laura Disenso

 It was Gelatin Night, last night in my Fall semester of Exploring Surface Design. This is always my favorite session.

It's an evening of pure play.

Laura Disenso

Laura Disenso

It's also an evening when the personal style of each student appears.

Laura Disenso

Laura Disenso

You see what they are drawn to.

Laura Disenso

What textures and colors they choose.

Kathy Perrin

Kathy Perrin

Kathy Perrin

Kathy Perrin

What stories they have to tell.

Mary Ellen Campbell

Mary Ellen Campbell

Mary Ellen Campbell

Mary Ellen Campbell

Mary Ellen Campbell

Mary Ellen Campbell

Mary Ellen Campbell

Mary Ellen Campbell

I always leave with a smile on my face (and so do the students)!


Tuesday, May 15, 2012

Gelatin Printing with 4-Year Olds


I spent this morning with a class of curious 4-year olds at my synagogue's pre-school. I was invited to come in to do a project and show some of my artwork by the class teacher, Joan. Joan and I have gotten to know each other over years of yoga classes.

I brought in some of my dolls and some printed fabrics (with animal designs) and then led them in a project printing with leaves and gelatin. It was great fun watching them arrange their hydrangea leaves, touching the fabric on the cool, soft jello and the surprise on their faces when they lifted off their pieces of fabric with the detailed designs left by the leaf veins.


All-in-all it was a very satisfying morning.

If you would like to try this project, you can get the particulars starting with the post: Kitchen Surface Design: Making a Gelatin Printing Plate.

Friday, March 23, 2012

Gelatin Plate Printing: Dandelion (9) Patch


Every time I play with the gelatin plate, the focus is a little different. I may start with many of the same or similar materials, but where the path leads in a particular printing session is always a little serendipitous.

My focus landed this time on dandelion heads and yarn and the concept of a nine patch quilt. I like the play on words as well...Dandelion (Nine) Patch.

Here is a selection of photos from my gelatin plate printing session (see the March 21 and 22 posts for more information about creating your own gelatin plate).

Wednesday, March 21, 2012

Kitchen Surface Design: Making a Gelatin Printing Plate

A gelatin printing plate


This past weekend, I spent a playful afternoon printing with a gelatin printing plate. I first found out about this technique from Rayna Gillman's book, Create You Own Hand-Printed Cloth. If you don't have this book--go out and buy it immediately! Rayna has a very creative, experimental approach to surface design. Her book is loaded with helpful step-by-step photos and beautiful examples. I refer to her book frequently.
The recipe that follows is from Rayna's book.


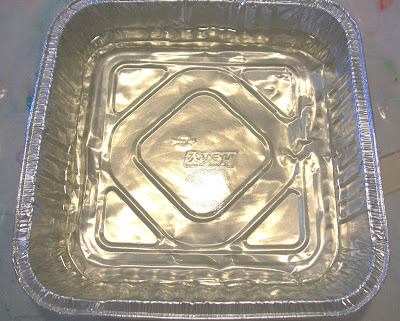
Here is what you need to create your own gelatin printing plate: A box of Knox Gelatin, a liquid measuring cup (that holds at least 1 cup of liquid), a metal whisk, an aluminum foil pan (8" x 8" approximately), access to water (and preferably a way to boil water) and a refrigerator.


Empty all four packets of the gelatin powder into the aluminum pan.


Add 1 cup of cold water.


Stir with the wire whisk until the powdered gelatin is dissolved.


Add 1 cup of boiling or very hot water.


Stir the gelatin until the bubbles disappear and the gelatin is clear.


Put in the refrigerator for 30 minutes or until the gelatin has set.

Once the gelatin is set, bring it to your work area. You will also need a knife (preferably not serrated) or a Popsicle stick, and  plastic to place under the gelatin. For plastic you could use a trash bag, plastic wrap, a piece of a plastic drop cloth or plastic film (acetate). You could also use a piece of aluminum foil or even freezer paper with the waxy side facing up. I'm using an old piece of acetate that has some paint on it.


Place the plastic on your work surface. Carefully slide the knife or Popsicle stick around the edges of the gelatin to help release it.


Flip the foil pan over onto the plastic and tap the back of the pan with your hand or the knife. This should release the gelatin onto the plastic.


If the bottom of the pan has a design or embossing, that will be embedded in the gelatin. If you don't wish to have that as part of every print you make, you will need to flip the gelatin over to the smooth side. Don't worry if the gelatin didn't release perfectly. As Rayna says, "It's not supposed to be perfect." (pg. 34)


Now that the gelatin has been flipped, you are ready to use it as a printing plate. More on that tomorrow.

If you'd like to see some of the prints my surface design students created with gelatin printing plates, take a look at the March 2 post: The Wonders of Gelatin.

And for those of you who were wondering about the outcome of the thickened dye fabric sample from my visit with Floris Flam, here it is!


Monday, March 19, 2012

Back In the Weeds

Gelatin ghost print of wild strawberry flowers and leaves

Gelatin silhouette print of wild strawberry flowers and leaves


I'm back to my weed friends again (see October 2, 2011 post Of Weather and Weeds). I decided to do some gelatin printing with them yesterday afternoon. These are a couple of teaser photos. I hope to talk about gelatin printing this week. In the meantime, it's a beautiful, sunny Monday morning and I'm off to sell some beads at Star's!

Friday, March 2, 2012

The Wonders of Gelatin


This Wednesday night, my Winter Exploring Surface Design class got to experience gelatin plate printing. I continue to be amazed at how each student jumps right in and plays so freely...layering prints, experimenting, "what if"ing. It is a wonder to watch. Below are some prints from class.

Mimi In

Mimi In

Janel Russell

Janel Russell

Susan Prytherch working with Tyvek

Susan Prytherch

Susan Prytherch on Tyvek

Catherine Muehleib

Catherine Muehleib