 |
| A gelatin printing plate |
This past weekend, I spent a playful afternoon printing with a gelatin printing plate. I first found out about this technique from Rayna Gillman's book, Create You Own Hand-Printed Cloth. If you don't have this book--go out and buy it immediately! Rayna has a very creative, experimental approach to surface design. Her book is loaded with helpful step-by-step photos and beautiful examples. I refer to her book frequently.
The recipe that follows is from Rayna's book.
Here is what you need to create your own gelatin printing plate: A box of Knox Gelatin, a liquid measuring cup (that holds at least 1 cup of liquid), a metal whisk, an aluminum foil pan (8" x 8" approximately), access to water (and preferably a way to boil water) and a refrigerator.
Empty all four packets of the gelatin powder into the aluminum pan.
Add 1 cup of cold water.
Stir with the wire whisk until the powdered gelatin is dissolved.
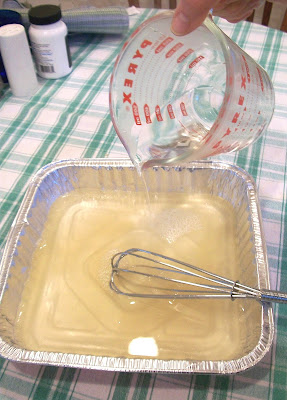
Add 1 cup of boiling or very hot water.
Stir the gelatin until the bubbles disappear and the gelatin is clear.
Put in the refrigerator for 30 minutes or until the gelatin has set.
Once the gelatin is set, bring it to your work area. You will also need a knife (preferably not serrated) or a Popsicle stick, and plastic to place under the gelatin. For plastic you could use a trash bag, plastic wrap, a piece of a plastic drop cloth or plastic film (acetate). You could also use a piece of aluminum foil or even freezer paper with the waxy side facing up. I'm using an old piece of acetate that has some paint on it.
Place the plastic on your work surface. Carefully slide the knife or Popsicle stick around the edges of the gelatin to help release it.
Flip the foil pan over onto the plastic and tap the back of the pan with your hand or the knife. This should release the gelatin onto the plastic.
If the bottom of the pan has a design or embossing, that will be embedded in the gelatin. If you don't wish to have that as part of every print you make, you will need to flip the gelatin over to the smooth side. Don't worry if the gelatin didn't release perfectly. As Rayna says, "It's not supposed to be perfect." (pg. 34)
Now that the gelatin has been flipped, you are ready to use it as a printing plate. More on that tomorrow.
If you'd like to see some of the prints my surface design students created with gelatin printing plates, take a look at the March 2 post: The Wonders of Gelatin.
And for those of you who were wondering about the outcome of the thickened dye fabric sample from my visit with Floris Flam, here it is!


thanks for posting this...will be interesting to try in combination with plant dyes...
ReplyDeleteLet me know how that works out...I've only done it with Setacolor paints.
ReplyDelete