Wednesday, March 28, 2012
Craft Foam Print Block: Embossing Craft Foam with a Pen
As I mentioned in the Monday, March 26 post, sometimes you when you are trying too hard to make something work, you happen upon a different, possibly even better way to resolve things. So, it was over the weekend when I discovered a way to create a mola design using craft foam.
I was inspired by this small, simple fish mola design.
After reducing the image to 4" x 6", I made a tracing.
I flipped the tracing over onto a 6" x 9" sheet of adhesive craft foam and used a soft rubber brayer (roller) to transfer the design.
If you don't have a brayer, you can use the back of a spoon to transfer the design.
I did a few tracings as I wanted to try some different techniques. Since the adhesive craft foam sheets are very thin, it's easiest to peel off the paper backing and adhere them to a thicker foam sheet.
Once your design is adhered to the thicker foam, cut the foam to size. You are now ready to emboss the block. Use a ballpoint pen and press down hard as you draw around the outline of a shape. Continue to fill in the shape, pressing down hard to compress the foam.
This is what the block looks like after it's been embossed. Now it's time to print.
I use Opaque Pebeo Setacolor fabric paints and a Rollrite foam brayer. Roll the paint out on a piece of glass until the brayer is evenly coated with the paint. Roll an even coating of paint onto the block. Turn the block over onto your fabric and press down. It's best to print on a padded surface.
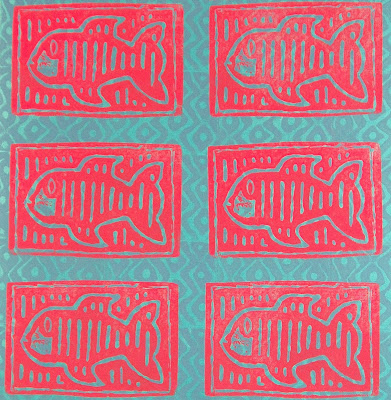
I printed some samples of the fish mola design for my Latin American Influences: Textile Inspirations class. I used painted backgrounds and first printed with a pattern block before printing with the embossed craft foam fish block. Tomorrow I'll have some samples using a freezer paper stencil I created using the same fish mola design.
Subscribe to:
Post Comments (Atom)


No comments:
Post a Comment