Welcome to Day #4 of the Fabric Printing at Home Blog Tour! Jane Davila is hosting the Tour today. When I read her bio I was very impressed by the depth and diversity of her art experience...
 |
| Jane Davila |
Jane Davila is a fiber and mixed-media artist who began her professional art career as a printmaker, specializing in etchings and intaglios. Her prints can be found in many private and corporate collections around the world. She switched to fiber, mixed media, and art quilting in the 1990s but still incorporates many printmaking techniques, such as screen printing, block printing, gyotaku, and thermofax printing, in her work. The experience of living in Peru in the 1980s has had a lasting impact on her appreciation for the diversity of cultural expression and iconography, which as a theme frequently shows up in her work. Repeating motifs of fish, birds, and insects reflect her ongoing fascination with nature, the environment, and human impact on both. www.janedavila.com www.janedavila.blogspot.com
Be sure to stop by Jane's blog today for a chance to win a copy of Fabric Printing at Home.
Sweet Silk Gift Bags
These sweet little silk gift bags are quick and easy to make using liquid dishwashing soap as a fabric resist.
You'll need some small silk bags (I got mine from Dharma Trading Company), a few Valentine's transparent fabric paint colors (I used Pebeo Setacolor), paint containers, plastic spoons, water, 1" foam brushes, a small plastic squeeze bottle (I used a Detailer Writer from Dick Blick), liquid dishwashing soap, a work surface covered with plastic and a piece of cotton or muslin fabric to absorb excess paint, an iron and ironing board or pad, a pressing cloth and a water source (for rinsing out the soap).

1. Set up your work area. I used a portable work surface (I describe how to make one in Fabric Printing at Home) but any flat surface covered with plastic and a piece of cotton or muslin fabric is fine.
2. Place a silk gift bag and the bag tie on top of the cotton/muslin fabric. Mix up 3 to 4 paint colors (add a little bit of water to the paint.).
3. Fill the small plastic squeeze bottle with liquid dishwashing soap. If you use the Detailer Writer, snip the tip so the soap can flow out.
4. Use the squeeze bottle to draw Valentine's designs on the silk bag. When the liquid dishwashing soap soaks into the thin silk, the designs will spread a bit. The liquid soap will act as a resist (resisting the paint).

5. Paint over the designs on the bag and also paint the silk bag tie. Set aside to dry.


6. Read the directions for heat setting the fabric paint. I used an iron and a pressing cloth.
7. Rinse the liquid soap out and dry the silk bag. You can stop at this point or go back and add another layer of dishwashing liquid resist and more paint (which is what I did).
Learn other techniques for applying liquid resists and pastes from kitchen materials in Chapter 6: Irresistible! from Fabric Printing at Home.
Today's giveaway is two plastic Detailer Writers. Use them to apply liquid resists or paint to fabric. Leave a comment for a chance to win. I will choose a winner at 11:00 PM Eastern USA time. Check tomorrow's post to see if you are the winner. Your comment also enters you in the final drawing on February 15 for a free
copy of Fabric Printing at Home: Quick and Easy Fabric Design Using Fresh Produce and Found Objects.

And now for the winner of yesterday's giveaway (an X-acto knife and package of #11 blades)....congratulations to Cathy in gorgeous Sonoma County! Please email me with your contact information (threadborn@cox.net) so I can send off your prize.
Tomorrow, the Tour stops at Carol R. Eaton's blog. Her hand-dyed fabrics are inspiring!!
Be sure to visit all the stops on the Tour:
February 2: Lisa Chin
February 3: Lynn Krawczyk
You'll need some small silk bags (I got mine from Dharma Trading Company), a few Valentine's transparent fabric paint colors (I used Pebeo Setacolor), paint containers, plastic spoons, water, 1" foam brushes, a small plastic squeeze bottle (I used a Detailer Writer from Dick Blick), liquid dishwashing soap, a work surface covered with plastic and a piece of cotton or muslin fabric to absorb excess paint, an iron and ironing board or pad, a pressing cloth and a water source (for rinsing out the soap).
1. Set up your work area. I used a portable work surface (I describe how to make one in Fabric Printing at Home) but any flat surface covered with plastic and a piece of cotton or muslin fabric is fine.
2. Place a silk gift bag and the bag tie on top of the cotton/muslin fabric. Mix up 3 to 4 paint colors (add a little bit of water to the paint.).
3. Fill the small plastic squeeze bottle with liquid dishwashing soap. If you use the Detailer Writer, snip the tip so the soap can flow out.
4. Use the squeeze bottle to draw Valentine's designs on the silk bag. When the liquid dishwashing soap soaks into the thin silk, the designs will spread a bit. The liquid soap will act as a resist (resisting the paint).
5. Paint over the designs on the bag and also paint the silk bag tie. Set aside to dry.
6. Read the directions for heat setting the fabric paint. I used an iron and a pressing cloth.
7. Rinse the liquid soap out and dry the silk bag. You can stop at this point or go back and add another layer of dishwashing liquid resist and more paint (which is what I did).
 |
| Here are the bags after a second layer of dishwashing liquid resist and paint. |
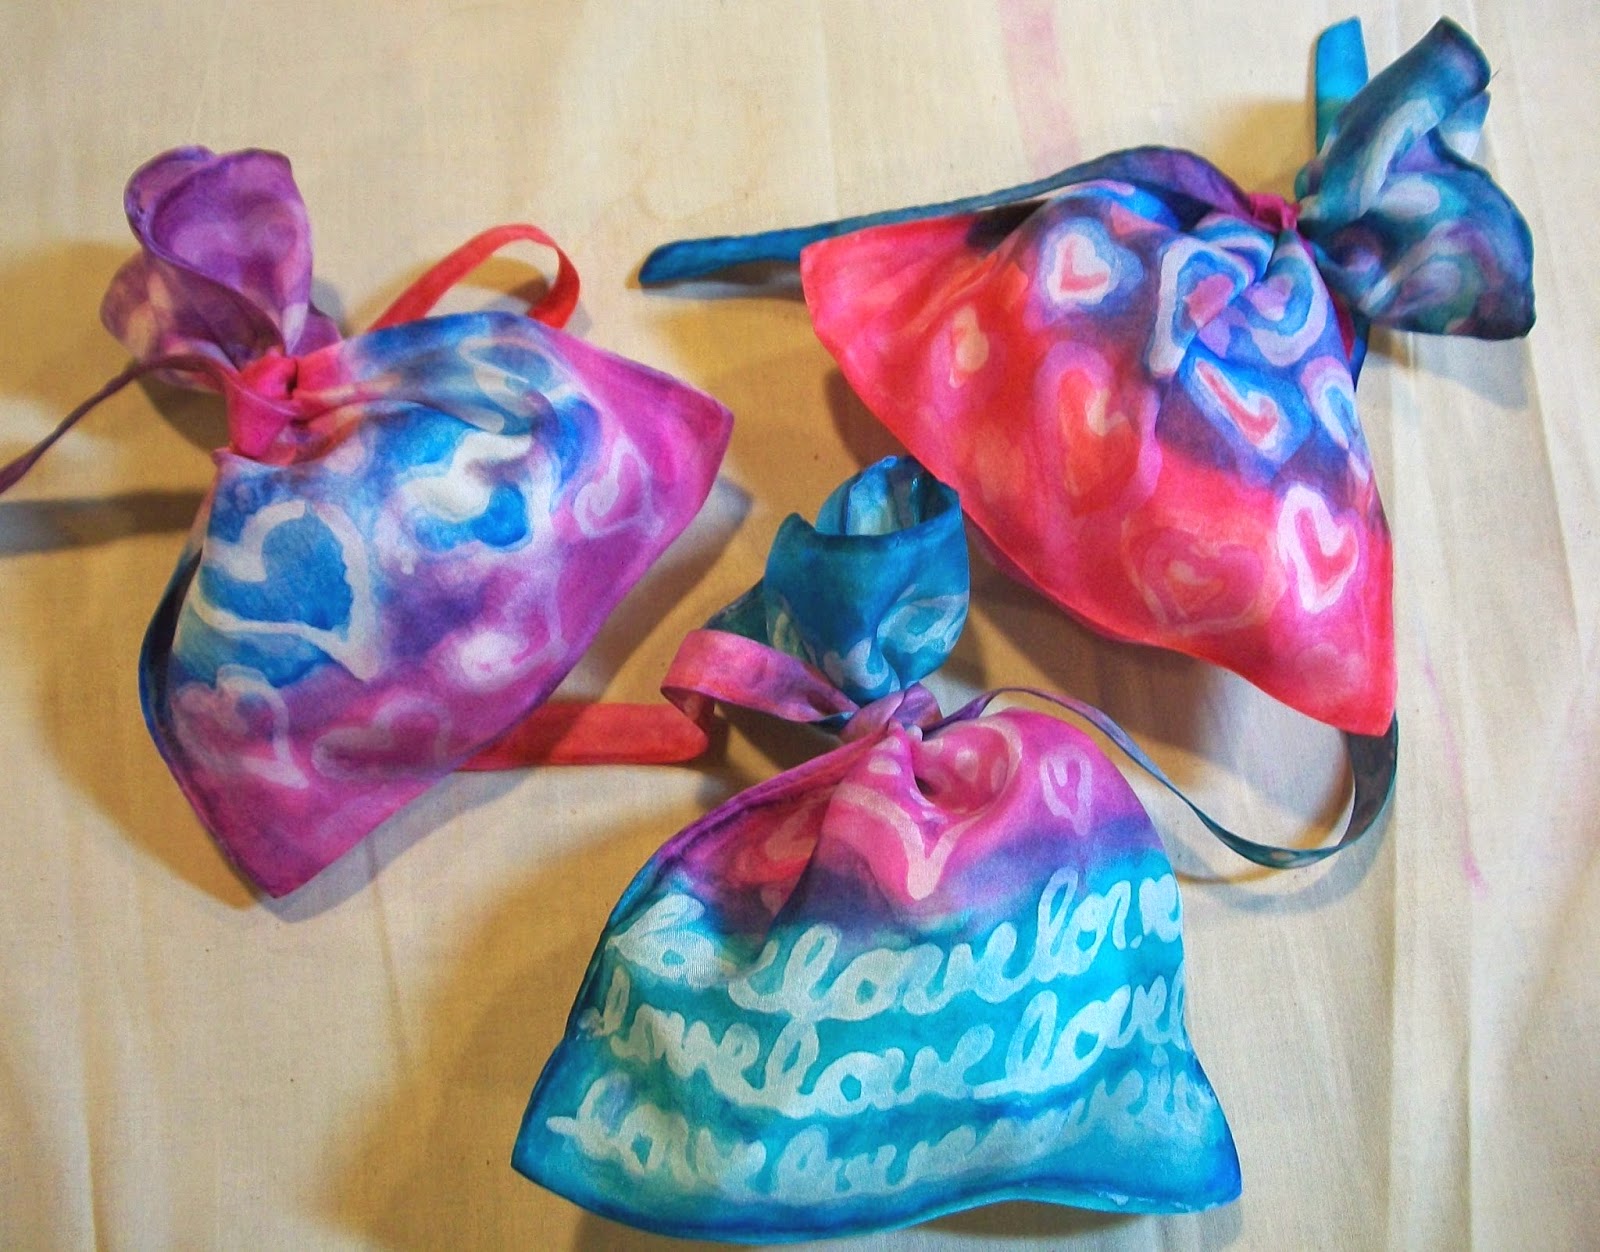 |
| Here are the bags stuffed with goodies and tied up ready for Valentine's Day! |
And now for the winner of yesterday's giveaway (an X-acto knife and package of #11 blades)....congratulations to Cathy in gorgeous Sonoma County! Please email me with your contact information (threadborn@cox.net) so I can send off your prize.
Tomorrow, the Tour stops at Carol R. Eaton's blog. Her hand-dyed fabrics are inspiring!!
Be sure to visit all the stops on the Tour:
February 2: Lisa Chin
February 3: Lynn Krawczyk
February 4: Jane Davila
February 5: Carol R. Eaton
February 6: Judy Gula
February 7: Susan Purney Mark
February 8: Teri Lucas
February 9: Jennifer Coyne Qudeen
February 10: Deborah Boschert
February 11: Lynda Heines
February 12: Cheryl Sleboda
February 13: Terri Stegmiller
February 14: Jackie Lams
Yet another great idea! Thanks so much for sharing!
ReplyDeleteYou're welcome...it's been fun!
DeleteCertainly would not have thought of using liquid soap as a resist!
ReplyDeleteIt's really an amazing resist!
DeleteOf all the techniques you taught i the class, I think this was my favorite. Why? So easy, with such good results.
ReplyDeleteHi Marcia- I keep figuring out new ways to use this resist!
DeleteVery interesting. There are so many techniques that are new to me
ReplyDeleteHi Janice- Glad that you are enjoying seeing all these...even more in the book!
DeleteCool...I could do that! Thanks for another fun idea. :-)
ReplyDeleteYes...so easy!
DeleteI'd love to try this Julie !!
ReplyDeleteGive it a go, Gill!
DeleteThis one reminded me of another technique using dishwashing liquid. Using dishwasher Cascade (I think) as a color remover or something similar. Are you familiar with it? I wouldn't have thought the soap would have resisted the paint -- is it any dishwashing liquid or specific to Dawn?
ReplyDeleteHaven't used anything with bleach to remove color...sounds cool! It's not so much the brand of soap but the viscosity. Don't use any brands that are too watery. In the book I say to let the soap dry completely on the fabric before applying the paint. Turns out, as I learned from one of my experimenting students, you can apply the paint while the soap is still wet!
DeleteThis looks like such fun! I'm loving this tour!
ReplyDeleteHi Lisa- So glad you're enjoying it...it's been fun to put together!
DeleteLooking forward to seeing your book!
ReplyDeleteIf I was not inMelbourne right now, I would run to my studio to try this technique out! Thanks for sharing!
ReplyDeleteHi Bonnie-Hope you're having a great time in Melbourne...try it out when you get back and let me know what you think!
DeleteI am going to try this one on the weekend. Such a fun and versatile project. This blog tour is great!
ReplyDeleteWould love to see your results!
DeleteI can't wait to try the soap as a resist. So much easier than glue. Thanks for the info.
ReplyDeleteBest part is washing out...no soap necessary to remove the resist...because it IS soap!
DeleteThis looks interesting, thanks for sharing. Have a great evening.
ReplyDeletedawnm1993(at)gmail(dot)com
Hi Dawn- thanks for stopping by.
DeleteBeautiful results!
ReplyDeleteThanks, Sue...one of my favorite "kitchen" resists!
DeleteThere's a little silk scarf around here somewhere ... so I don't have to buy anything to try this.
ReplyDeleteGreat...hope you post the results!
Delete